Since hauling Windsong out of the water I have been focusing most of my energy on her hull below the waterline. My goal was to get the hull to the point where it could dry out for the rest of the time on land. This would mean removing paint and the gel coat (if necessary) and then leave the hull alone while I worked on the rest of the boat. Fiberglass boats do in fact absorb water through osmosis (what creates blisters). The hull needs to be completely dry before I apply the planned epoxy barrier coat (protects against water absorption) and then paint.
I had researched many different ways to remove paint from the bottom. The most common choices are to sandblast, grind, use a chemical peeler, or just old fashioned muscle and scraper. I opted for the simple method of scraping with a cheap paint scraper from Home Depot. The bottom paint was loose enough where the majority of it came off with the scraper. I would scrape a section of hull then go back and sand away the remaining paint down to the gel coat. I started at the bow on the starboard side and worked my way back.
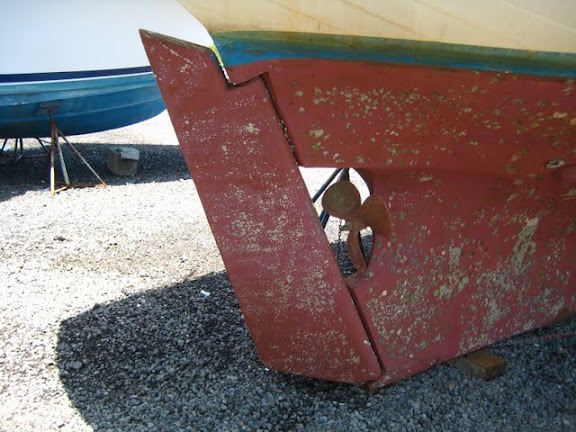
Here is the hull after the first weeks work:
Removing the old paint to the gel coat revealed quite a few small spots where fairing compound was used in some sort of repair. It also revealed the blisters I feared would be present. The worst case scenario in my mind were thousands of small blisters all over the hull. But what I discovered were isolated, larger blisters averaging about 3-4" in diameter (some larger some smaller). When I found a big blister I would drill into it with a countersink bit to release the fluid inside. The fluid is some sort of gross acidic chemical that smells very distinct and shoots out at high pressure. It is always fun to pop them, but I always seem to get the stuff all over me. I would drill a pattern of holes all around the area of the blister so they would drain completely, and could be flushed out with ease. Cleaning and flushing the blisters with fresh water removes salts, chemicals and other nasty stuff that slows drying time.
Drilled out blisters. You can also see all of the old repairs/fairings:
Small blister completely ground out:
Another small blister, and even smaller ones showing the poor condition of the gel coat
I determined that the blisters needed to be ground out completely until I reach undamaged glass. Since these are deep and large, I will need to build the leftover hole up with layers of glass before fairing compound.
Ground out blisters below. I have yet to bevel and shape the ground out blisters completely for repair, only ground out to dry:
After scraping and sanding for a week or so, someone at the boat yard saw me struggling with my scraper and going slow as molasses. He recommended that I use a pressure washer with a special nozzle attached to really blast off the loose paint. I did so and was able to get all loose paint off (most of it!) with only an hours work with the hose. This was fantastic compared to the slow slow work of the scraper.
Unfortunately the blasting revealed many areas where the gel coat was in such bad shape it just chipped away. Some areas where it chipped away revealed more blisters and hydrolysis (water damage) in the first layer of glass. After wasting a week working on sanding down to the gel coat, I know accepted the fact that the gel coat needed to be removed completely so that the glass underneath it can dry out.
Here are some pictures of the hull after the pressure blast:
So I re-tooled and began to grind away the paint and the gel coat underneath it down to bare glass, grinding out any blisters or evidence of hydrolysis I came across in my path. I've been experimenting with many different pads for the grinder and have settled on using a 4 1/2" rubber backing pad and 36 grit disks. Most of the time it comes out pretty even, but I'll have to go back over the entire hull with my random orbit or palm sander to get it nice and flush.
Here is the hull after a week or so of grinding. I started the port side when I came to work on the boat early on a Sunday, the sun was on the other side so I switched to the shady one :)
By the end of this week I should be over half way done. Once fully ground off, I'll leave the hull to dry out while I turn my focus above the waterline, the deck, and the interior.
Once most of the projects above the waterline are out of the way I'll follow this procedure to finish the bottom job:
-Sand entire hull smooth
-Repair deep blisters and any other major damage (keel) with layers of glass
-Fill and fair small blisters and gouges until smooth
-Apply epoxy barrier coat
-Apply anti-fouling paint