Friday, October 22, 2010

Removing old Thru-Hulls and Seacocks

One of the things I knew about Windsong when I first saw her was that all of the seacocks needed to be replaced ASAP. They are very old-school style Groco seacocks and all have corroded to the point where they are inoperable. What does that mean? If a hose were to leak, I would not have had a way to shut off the thru-hull and the boat would probably sink unless the hose or seacock was plugged.

Seacocks are meant to be the #1 insurance on the boat against sinking, and I didn't have that insurance for the entire time I owned the boat in the water. Since I started the bottom job I have been contemplating how the heck to get the seacocks and thru-hulls off the boat. They were so corroded that unscrewing the thru-hull from the seacock was impossible. I spent many months contemplating my approach and did as much research I could on the subject. Unfortunately there aren't many articles written on how to get this job done on old, corroded equipment. There are plenty of articles on how to take apart modern seacocks, but non on how to tear apart old ones with no hope of reuse.

I did, however, find a few blogs and forum posts from people who just cut the thru-hulls up with a Dremel or some other tool to help remove them. But with my limited experience in doing things like this, I really needed a step by step instruction on how the heck to do that. After some creative thinking and experimentation, I finally figured out how to do it and here I will show my process.

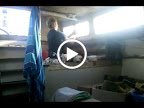
Here are the seacocks in the head with hoses removed. One is the sink drain, another is for the head itself, the other was unused with no plumbing coming from it.


Here are the thru-hulls attached to these seacocks


Each seacock has two bolts that go through the hull that needed to be removed. My dad and I began this job back in May by removing the hoses to the seacocks and the bolts that go through the hull. Once we reached that point, we were stumped as to how to remove the thru-hull from the seacock. So after my research I took a stab at cutting the thru-hulls to remove the mushroom head so I could just pull the seacocks out from the inside.

I removed the three thru-hulls from the head seacocks before I got down there with the camera, so the sequence below shows the thru-hull from the galley sink. As you can see, the two bolts are still attached so I wasn't able to actually remove that seacock until I get a second hand, but the process is still shown.

First, using a cut-off wheel on my Dremel tool, I made a series of cuts to create some pie wedges. For the bigger thru-hull in the head, I needed to make a few more slices.


In my research I learned that bronze is a pretty soft metal, so cutting and bending is quite easy. In this next step, I hammered a scraper/chisel under one of the slices and pulled down to bend the slice outwards a little bit, enough to fit the back of a hammer under the slice.


With the hammer under it, pry the piece right off. The pieces pried off surprisingly easy.


Repeat the process for each slice until all you have left is a the clean shaft of the thru-hull in the hole.


At this point I went inside and removed the seacock by just pulling it out. One seacock just fell off after cutting the mushroom, one needed to be pried off with the back of the hammer, and the other just needed some muscle to pull out. Here is the head area with all removed:

Outside:


Inside (thats a flashlight in the middle):


Old seacocks. You can see how corroded they are, no hope for the valves to turn. They are not the newer style Groco seacock with a locking nut on the base.


After figuring out this process, removing these things is a piece of cake. I'll need some help to get the remaining seacocks unbolted, but I am no longer worrying about the process when comes time to start fairing and repairing the bottom.

I'll be using these articles as reference to install new thru-hulls and seacocks (links):


Wednesday, October 13, 2010

Deck Disassembly Continued

Greetings! The past couple of weeks I have spent a good amount of time working on Windsong's decks, removing windows, and continuing the disassembly of the interior. I have been hoping to reach some finishing points on each of the areas I've been working on before blogging, but something always halts me and leaves each sub-project incomplete for a while. So for the sake of having something to post, I'll just show what I've done so far.

Most of the hardware on deck has been removed, with the exception of the stanchions and all hardware on the caprail. I haven't decided the path I will take on the caprail: remove the teak caprail to rebed, or just fillet some epoxy or sealant on the seams. I would remove the whole caprail but the bungs hiding the screws are not coming off easily and I find myself damaging the surrounding the wood with each try. I've learned all the different techniques for bung removal by disassembling all of the woodwork on the interior, but these exterior bungs are trouble. I could just leave the caprail on, clean and sand it, then seal the edges; but I know that won't be as good as removing and rebedding it fully. I just don't want a chipped up caprail in the end. Another option is to remove the bungs and just re-drill bigger holes to remove the damaged areas in the existing holes.

Aside from the hardware, there is a bit of teak trim on the decks of Windsong that needed to come off for re-bedding and deck painting. The trim came of easy enough, and once off I filled the screw holes with thickened epoxy to seal. Since the trim is on a vertical surface, I opted to use West System's Six10 Adhesive to fill them in, since it is already thickened and in a tube for easy use.

We (Jenny and I) also spent the time to remove all of the old windows. The windows (ports, deadlights, whatever you want to call them) were completely shot and I plan on replacing them all with quality opening ports. The large windows I have yet to decide on what to do with; I will either glass in the entire area and cut out smaller ports to make the boat more safe and seaworthy, or just replace them with quality frames and glass. Right now I am leaning towards glassing them in as shown here.

I have also finally removed the entire headliner inside the boat and have cleaned up the exposed glass a bit (tons of rusty staples used for the headliner). The interior is almost to the point where I can begin prep for painting, but I will wait for that so I can finish the priority projects.

Here are some pictures of the work done in the past few weeks:

The deck trim:


Removal:


Holes taped, drilled a little bigger, countersinked:


Filled with goop


Removing Windows!

Had to start by chizzeling away the frames. They were stuck on there with decades of goop and sealant.


Once the frame is chipped away, its time to bash the window out as demonstrated here (video):

From Disassembling Windsong

Then chip away the remaining sealant


The headliner was stapled into the core of the windows. I had to remove each rusty staple with some pliers.


I then sealed up the windows with some plastic. Here are the decks after window removal


The weather has been fantastic at the boat yard in the evenings. Recently, was able to work on the boat and not have to take a shower afterwards for the first time all year.


As always, you can see all the pictures of my progress here:

Disassembling Windsong