In the process of restoring Windsong I have been taking home pieces of interior wood and trim to work on when I have time. All of the interior woodwork was stained with a dark reddish hue and didn't appear to have much of a finish coat of varnish or anything. The woodwork is mostly teak with a few mahogany pieces.
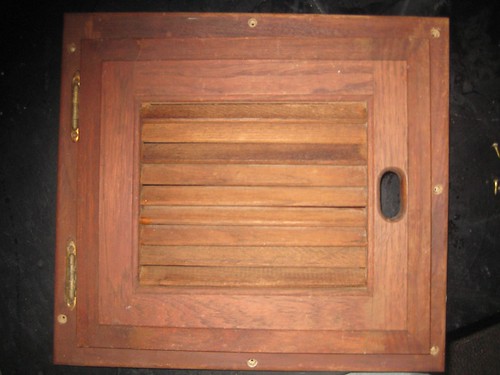
For an example, here is a teak cabinet door and its trim taken from the v-berth. The lighting doesn't show how dark and ugly the stain is, but you get the idea.
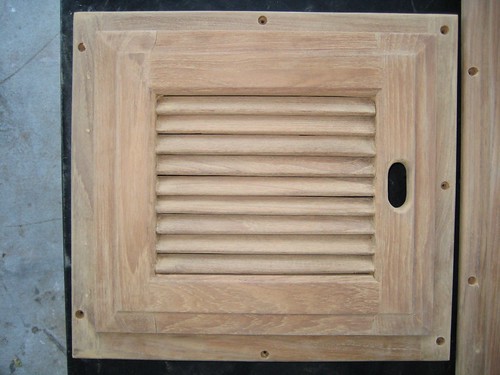
For each piece I clean the wood off then strip the old finish and stain with a chemical stripper. After stripping I sand the piece down to 220 grit all over and end up with some nice looking wood:
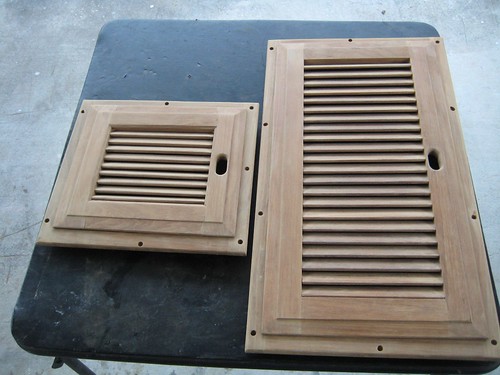
with a bigger cabinet door & trim:
My question now is what do I do next?
My current plan is to use Minwax Helmsman to finish, but am unsure about how to start. They recommend using the Minwax stains for a first coat and if I want to keep the color of the teak I assume use the "natural" stain. But there are a few areas where there are nicks and dings which will need to have wood filler applied before finishing. Will a stain be necessary for these patched ares to not stand out? Will this require me to stain all of the wood a darker color for uniformity?
Would a few thinned layers of the varnish do the same thing to seal and provide a base layer? Or would their brand of stain work best as a base coat?
My other concern is the trim. As you can see in the photos, the trim has large holes for the screws which were bunged when attached to the boat. I am nervous about applying finishing to the trim when I will need to affix bungs later on. I figure putting the bungs in and sanding them down flush would ruin whatever finish I put on the trim. So would it be a good idea to install the trim raw, bung, then finish; or finish the trim, bung, then patch whatever areas were sanded down? My concern is the finish around the bungs would look different to the surrounding areas that didn't get the sanding/refinishing.
4 comments:
We'll see if the comment space is big enough...
Here's what I did when I refinished the entire interior of Eolian (you can see some examples on my blog if you look for the heat pump installation or the cockpit coaming refurbish projects):
1. Mount everything that needs to be bunged, bung the holes. When the bung glue is dry (I use 5-minute epoxy), knock off the tops of the bungs using a chisel (tilted slightly up, so that you leave a little bung). Sand the bungs flush.
2. Very carefully mask around the mounted piece.
3. Apply coats of varnish. I wouldn't go more than 2 coats without pulling the tape and re-masking - otherwise the tape gets glued down too securely with varnish. (You could leave the tape on for the third coat if you pulled it before that third coat sets).
4. Sand between coats with 220, open coat sandpaper. Except for the next to last coat, if you can avoid it.
5. For the doors themselves, it takes two sessions to get one coat (one for each side). Do the back side first. After coating, but before the varnish is set, take your finger and go around the edge where some varnish may have crept/dripped/run onto the other side. Wipe off your finger on a rag, and keep doing this until the excess is removed. When that side is dry, turn over so that the right side is up, and repeat, again wiping the edges. Other than taking twice as long, doors are easier because there is no masking involved.
I don't believe that stain is required as a first coat. If you want natural teak, just go ahead and use varnish (thin the first coat for good penetration). If you want to match that original color, you might try making the first coat Minwax Polyshades Colonial Maple (it's a colored varnish - not a stain) - it should be pretty close.
It is going to be difficult to find a filler that will match the teak in color as well as in absorbancy. I fear that filled places will stand out more than if you just left them alone and varnished them. Remember that after a couple of years, your new finish will have dings in it too, and you'll be recoating things eventually. (If you have large chunks missing, you should dutch in a piece of teak of similar color and grain.)
Let me know if this isn't enough information
bob
s.v Eolian
DE45 #11
Seattle
I also need to add that varnish is a religion among boaters.
Expect impassioned replies... ;^)
bob
Thanks for the tips Bob! I appreciate the info it cleared up some things.
I definitely get the feeling that varnishing is a very sacred topic amongst boaters, I feel my self already becoming obsessed with it.
Do you have a specific brand that you prefer for varnishing? Also, would you go with glossy, semi-gloss or satin look for the interior?
Before working on boats, I used to think that the $15/qt varnishes were pretty good, and that if I wanted to splurge I'd get something for $25/qt. Then enter the boating world, where varnish costs $45/qt. But you know what? It is worth every penny of that. I use Interlux 60 (satin finish) and Interlux 95 (gloss, exterior) polyurethane varnishes.
On Eolian, the cabin sole is gloss and all the remaining woodwork is satin. Oh yeah, and I am doing a multi-year experiment - I have stripped one of the shower grids to bare wood to see how it holds up. Good, so far...
bob
s/v Eolian
DE45 #11
Seattle
Post a Comment